Posts

Showing posts with the label The Great Tree Project

The hobby week 28 May to 03 June

Image
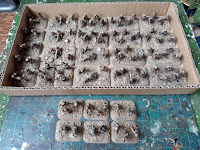
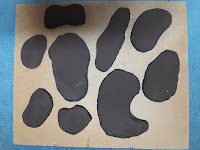
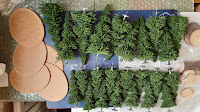
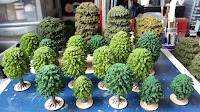
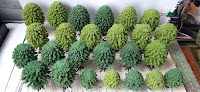
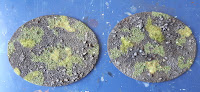
I've been fully focused on my WW2 Italian Campaign project this week. Painting/modelling   I finished the bases makeover of the Allied part of my Italian Campaign collection which you can see here . I based my poplar trees.  These were the last trees that needed basing from the job lot I bought many years ago and based last year ( see The Great Tree Project posts ).  I used the same basic methods described in these posts, but with the colour palette I'd used for the Italian Campaign figure bases,  Algerian War figures and Mediterranean hills and scatter that I've been working on in 2022.  I've started improving my collection of 15mm Spanish buildings, which I'm using as generic Mediterranean buildings.  These are all Empires at War MDF that I built a few years ago.  Nice buildings overall, but there's always improvements you can make on MDF kits and that's what I'm going to be working on.  These will be my focus for a couple of week at least ...

More woodland scatter terrain

Image
After completing the first batch of woodland scatter I very quickly knocked up another batch.   The steps are described in the earlier post, so I won't repeat them here.  The only change I made was to paint the whole of the base including the edges with the Leather Brown colour as soon as the sand was dried.  By taking a bit more care with the drybrushing, I didn't have to do this at the end like I did with the first batch. That's a total of eighteen pieces made over only the last 4 or 5 days.  These have been good to fit in whilst working as you need to allow time for the various stages to dry, so you can do a bit before work and it'll be ready for the next stage when you get home.  They're going to make my woodland games look much better.  

Woodland scatter terrain

Image
Taking a break from the Sikh Wars project I decided to make some scatter pieces to complement the tree bases I'd made last year. I spend a lot of time walking or running in mixed deciduous woodland and there's much more to a wood than trees.  Much of the greenery is from the understudy community of numerous plants and I wanted to simulate this.  As these pieces didn't need any strength I decided to make the bases out of EVA foam sheets.  It's more or less weightless, takes paint and scatter material well and can be cut with scissors.  Therefore it's quick to work with. I always paint the sheets with cheap craft acrylic paint to begin.  I think it gives a better starting surface. After cutting out the basic shapes and bevelling the edges with scissors, I covered each shape with PVA and added my usual sand mix.  They were left to dry overnight. Next stage was an undercoat of Dulux matt emulsion that I'd had mixed up to match Vallejo Leather Brown.  Once ...

The Great Tree Project, Phase 3 - conifers

Image
Since finishing the Sikh regiment I've really lost my painting mojo.  This is partly due to real world happenings but I just don't have any enthusiasm for it. However, rather than do nothing I thought I'd get on with the next phase of The Great Tree Project. This phase is all about conifers.  I've had a box of 25 Noch mixed size conifers for at least 20 years that need basing. Like the other Noch trees these have moulded on roots.  But unlike those they've  already got some texture on the trunks.  That saves some work which is always good.   I followed a lot of the same processes as before (see here , here , here , here and here ) and will only detail anything I did differently.  Large bases cut out, locating pins added and trunks painted I'd only got one large base left but on rooting through my hoard of useful bits I found some 2mm mdf board which I think was the back of a picture frame. It was easy enough to cut five more large bases using the ...

The Great Tree Project, Phase 2 - basing and finishing off

Image
The trees have been dipped in PVA, the detailing and painting of the trunks is complete, we're finally onto basing.   All based and ready for texturing Apart from using smaller size bases (30, 32 and 40mm) and gluing rather than drilling holes to attach the trees, the  bases for the Noch ones were done in the same way as in Phase 1 (details  here and here ).  I only used a couple of bigger two tree bases this time.  I also deliberately left eight trees unbased.  The moulded on roots of the Noch trees mean they'll stand reasonably well if carefully placed.  This gives greater flexibility to mix them in with the larger trees from Phase 1 and change the trees about on the multi bases.  Large bases with texture added With additional flexibility in mind, while I had everything out I removed a couple of the trees from the Phase 1 three tree bases.  As they were screwed in this was a simple job.  I made a few extra single bases for these l...

The Great Tree Project, Phase Two - Preparation stage 2

Image
I had to wait a full 2 days for all the trees to thoroughly dry from stage 1 .  It seemed to have work as very little flock was now being shed when I handled the trees. The next stage was to improve on the tree trunks which was smooth shiny plastic and didn't look good.  The trees did have quite well done roots and as any horticulturist or arborist knows it's the roots that are important... Before (L) with Green Stuff applied (R) I used the same method as before.  Mix up some Green Stuff, pull it into thin layers and wrap this round the trunks pressing it down until the trunk was covered to the top of the roots.  It was then a case of randomly making marks on the putty to simulate a tree trunk's fissures.  This was a relatively quick but not so painless process as I found by the time I'd done all 25 my finger tips were aching from working the putty into place!  All 25 with putty and texture applied I let these dry a full day and then painted  them usin...

The Great Tree Project, Phase Two - Preparation stage 1

Image
Waiting for an order of figures to arrive has opened a window to start the next phase of The Great Tree Project.  To recap, I have a lot of different trees in various boxes around the house and this year I was determined to improve the look of them and make them easier to use for gaming.  I made a good start and that's been documented here and here . The next batch is a bag of 25 Noch Gaugemaster mixed size trees.   These were bought from Hunstanton Models , a glorious bricks and mortar model railway/model shop in Norfolk.  These shops are such a rare gem that whenever we go away I always look to see if there's a hobby shop to visit.  Hunstanton Models with obligatory old fella The trees had shed a lot of flock, perhaps because they'd been in their bag for 2 years,  I didn't want this going everywhere so first job was to sort this out.  A bit of Googling brought up that soaking in a PVA/water mix should fix it.  I tried brushing this on but i...

Quick tree bases and hedges for 6mm

Image
After making some  fields  in preparation for my Seven Years War game, my thoughts turned to that staple of the wargames battlefield - trees.  All the trees bases I prepared for the Great Tree Project  are for bigger scale games and would look bizarre on the 6mm battlefield.  I had some work to do. First off I checked what I had.  I had a small collection of suitable sized trees and also a big bag of cheapo eBay trees from China.  Of course all of this stuff has been sitting about for ages maybe 20 years or more.  A major factor in basing all the large trees was to preserve my terrain boards (rather than just sticking the trees direct into the polystyrene) and also to help with game setup time and I wanted to continue with this idea.  I needed some bases.  Looking in my bases box I came across those from when I r ebased my Franco-Prussian war collection .  I'd managed to carefully prise the figures off and leave the bases in good co...

The Great Tree Project, Phase One - Week Two

Image
You can read week one here . Day Eight (30/05) Having got the bases to a reasonable point, albeit still far from finshed, I had planned to get on with the trees today. However, when I sat down at the painting table I changed my mind and decided to get the bases done and dusted. To start I glued two different shades of static grass onto the bases.  I was quite careful with this, sticking patches on to link or break up the flocked areas. Close up of two large bases with two shades of static grass added Once the grass had dried I added two different shades of finely chopped lichen onto the bases. As with the static grass this was quite deliberate. I took some care to glue some lichen round any bigger stones. With lichen added Next I stuck  some self-adhesive static grass of three different heights and three different shades onto the bases. I used moss, green and battlefield mix all from Tajima . I then finished off by adding some self-adhesive bushes.  After a break for anot...