15mm Tudor house make over
Last October I bought a 15mm Tudor House from Warbases to see whether it would work alongside my Hovels Tudor buildings I've had for a dozen or so years ago. The Warbases house (link here) is as you'd expect a simple MDF kit. It's nice enough but by it's very nature is flat and therefore a bit dull, especially compared to the Hovels building which is full of character. It's also got a larger footprint than the Hovels one which is fine for skirmish games maybe not so much for battles. I decided to give it a makeover.
Before I did anything I painted the inside of the building with matt emulsion paint coloured matched to Vallejo Model Colour Leather Brown. Then I started work.
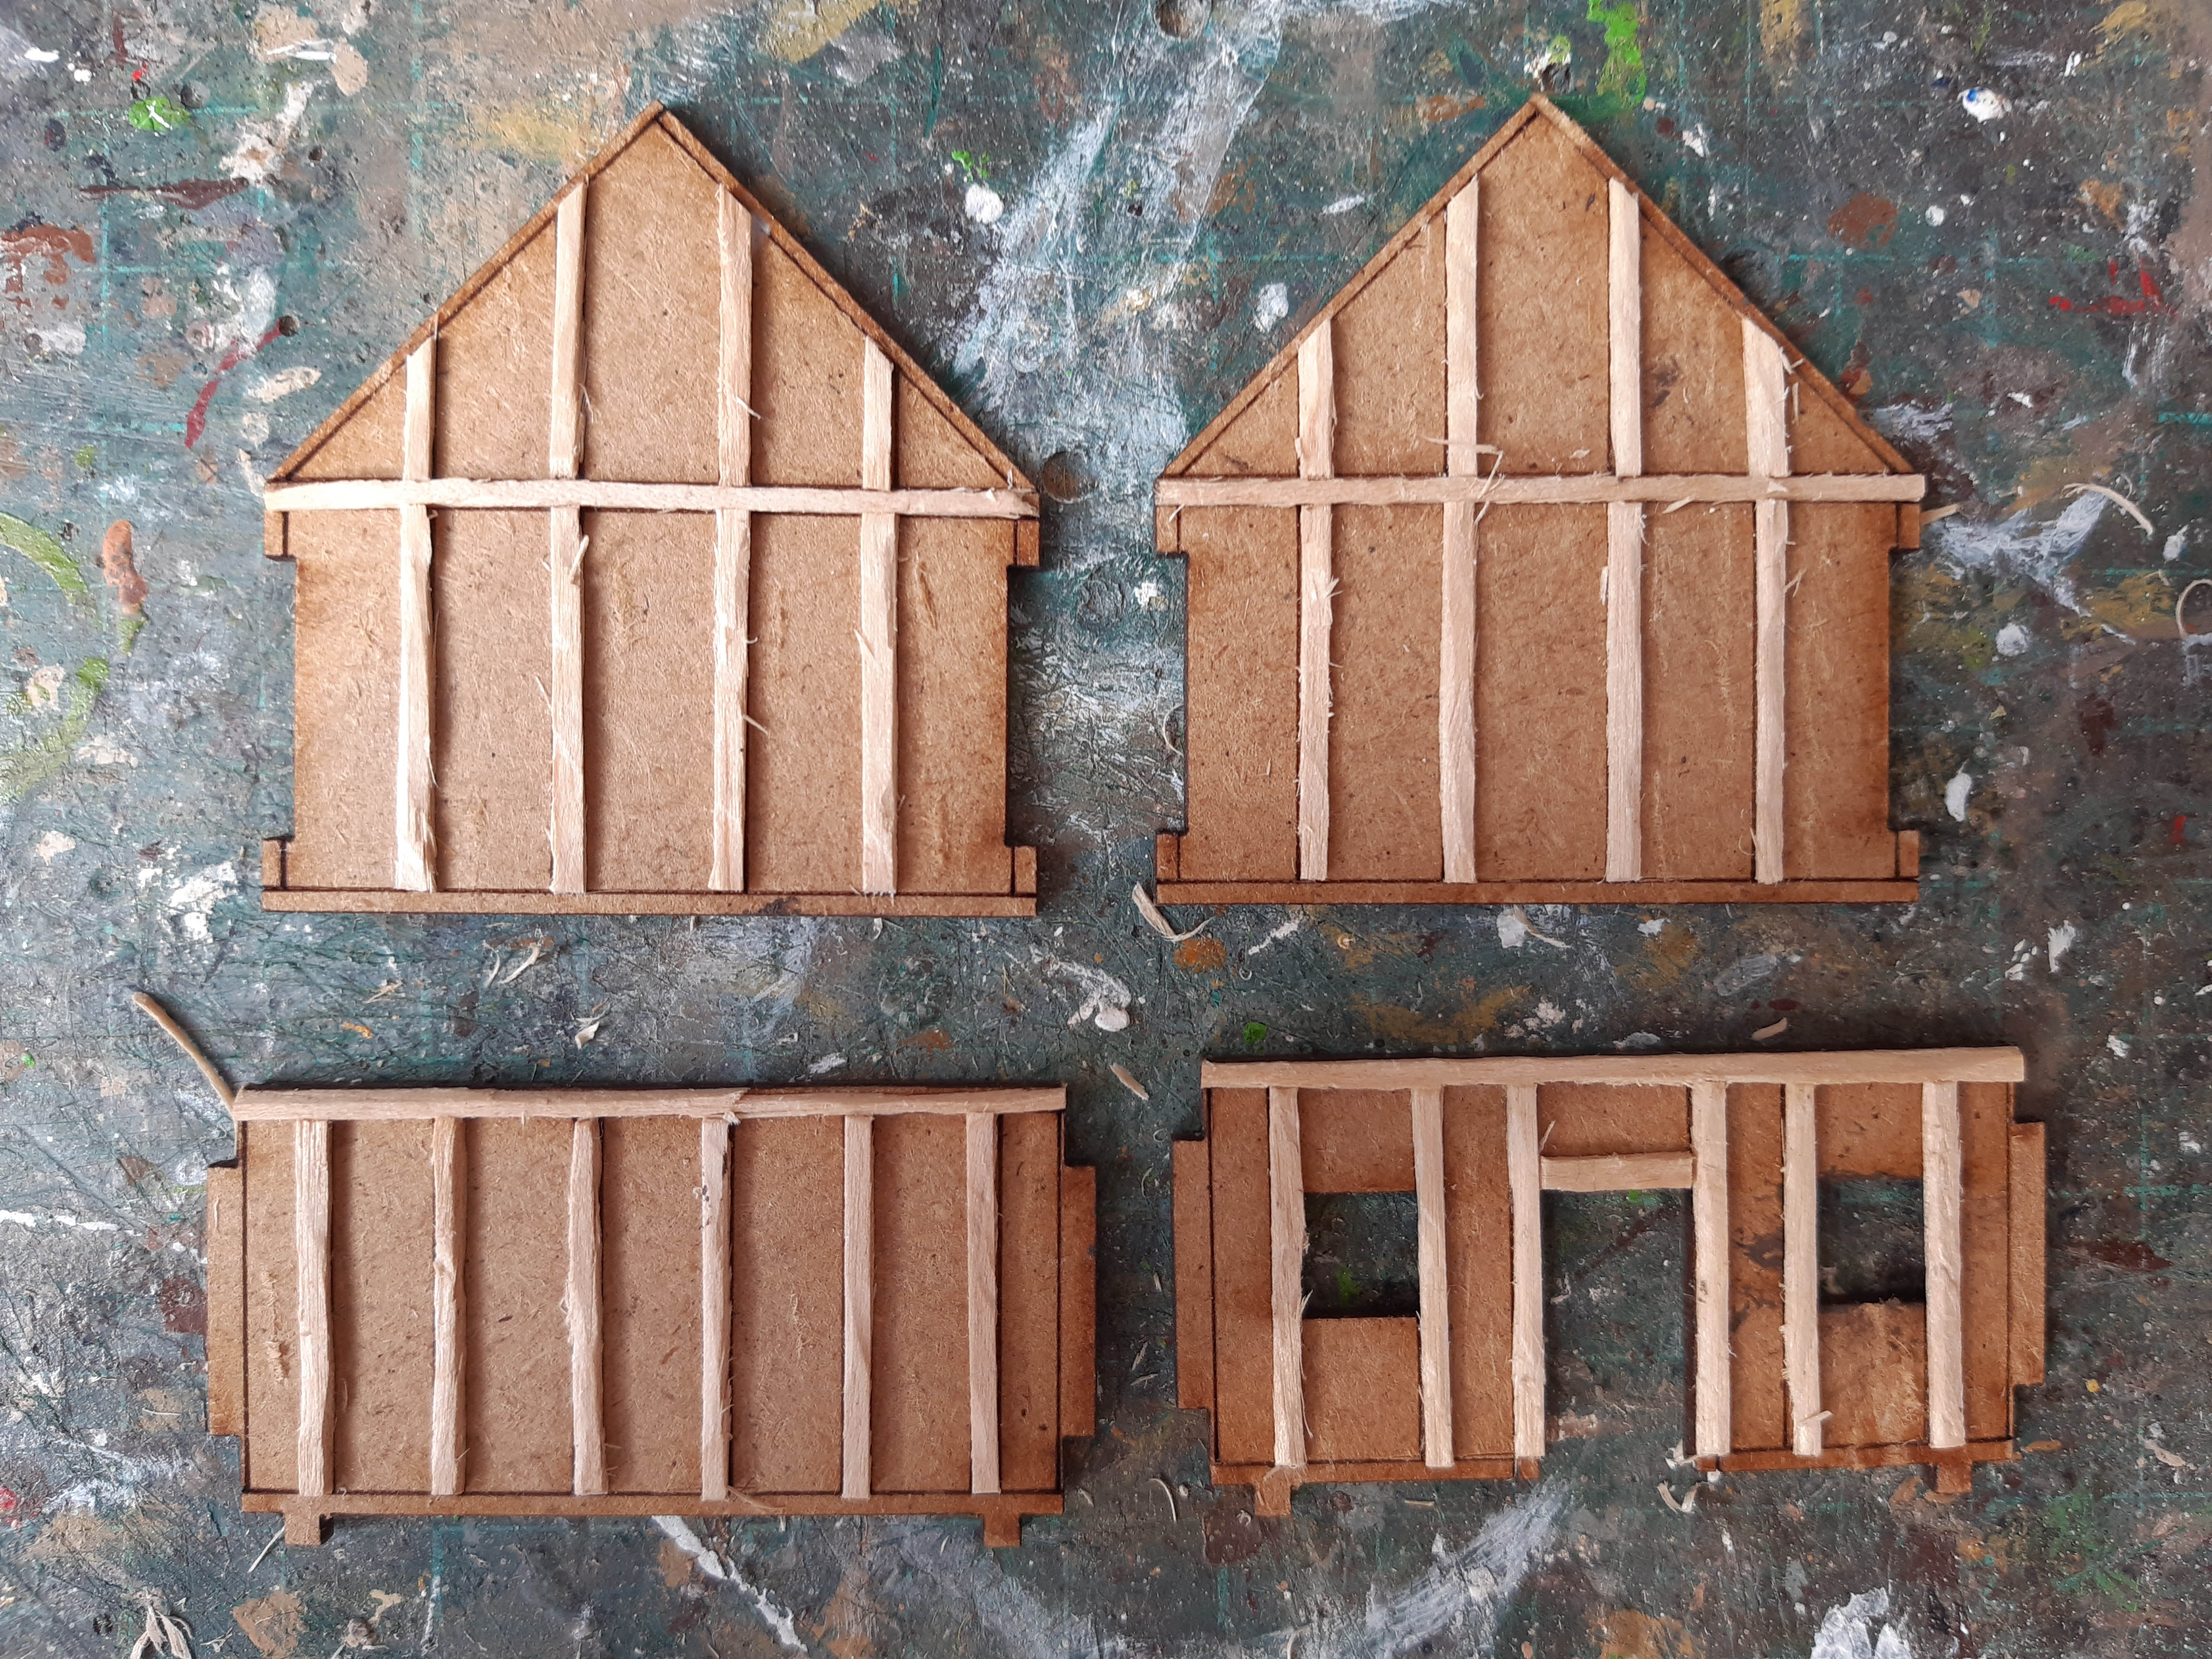
First off I added wooden beams. Using the lines marked on the kit as a guide, I cut strips of coffee stirrers roughly 1mm wide by 1mm deep and stuck them on with PVA. I trimmed them to absolute length when they were stuck down.


When all the beams were stuck fast I shaped them. I used a sharp craft knife and this gave them a more realistic, worked look.
I then assembled the house sticking it to its base and letting it dry. This set the walls nice and firmly. I then decided the base would limit how flexible the building was to use so I cut it off! This was very easy to do with a study Stanley knife and I've kept the base to use at a later stage.


At this stage I'd not added the beams to the apex of the building below the roof or at the corners. I now did this and this was the fiddliest bit so far. The area along the roof line left a small area to glue and I had to get the angles right. I continually kept offering the roof up to the building and trimming the beams so the roof would sit properly. The corner beams required me to cut separate pieces for each edge, fill the gaps and then shape them. There was a bit of swearing at this point.

I then added the texture on the walls between the panels. I used Vallejo Model Colour Earth Textures Dark Earth paste to do this. If the above stage was the fiddliest then this was the messiest! I started out with all good intentions, using a small craft tool to apply the paste between the beams and trying to be neat. However, it still went onto the beams so in the end I slapped it on and then scrapped it off the beams with a craft knife.


I'd done all the messy bits now and it was finally time to apply some paint. I'd always thought that it was a myth that Tudor homes were white walls with black beams. Apparently a lot were so I went with that. I stippled on some Citadel Wraithbone and then added highlights of Revell Matt White for the walls. The beams were painted in black craft paint with a grey drybrush highlight.


It was now time to do some roofing. By adding the beams I'd slightly increased the size of the house and the original roof looked a little small. I had originally intended to use it with added card roof tiles. I now decided to give it a thatched roof. First off I cut some corrugated card to shape, scored it and folded it over the building. I then used the original roof pieces and some elastic bands to hold it in place. After leaving this for a couple of hours it bent the card to fit exactly.


Now I had my basic roof I could work on the thatch. Turning to the pack of cheap scourers that I'd used for the woodland copses (here), I used the card roof to mark our and cut the thatch. I then painted the thatch using the same Leather Brown emulsion I'd primed the inside of the building with. After scoring the thatch down the centre so I could shape it, I stuck it on to the card roof with PVA and then as above used the same elastic band method to set it in place for a couple of hours.


There were a couple more steps to finish off the roof. I'd cut the scourer wider than the card. I now used some superglue to tuck it back in and cover the card edges. You can see in the picture below left how the card has been shaped exactly to the eaves of the house. The final step in building the roof was to cut a length of scourer and stick it to the top of the roof with superglue.


Once I'd covered all the roof in the Leather Brown matt emulsion, I liberally drybrushed it with matt emulsion coloured matched to the old Citadel Khemri Brown. I then added further highlights of matt emulsion colour matched to Vallejo Iraqi Sand. I kept doing this until I was happy with the results.


The last detail was to add the door. I used the piece that came with the kit. I wanted to keep the panel etched into it so decided to use washes of Army Painter Dark Tone which has worked quite nicely. It's added tone but preserved the bit of detail. I then used PVA to stick this to the inside of the kit, which also adds a bit of strength.

And there we have the completed building.


MDF kits have their place and have helped a lot of gamers get buildings onto the table more quickly, but personally I'm not a huge fan. This costs £5 from Warbases and even if you didn't make the improvements I did, you still have to paint it. The Hovels "Peasants house in timber frame with ship lap roof" which is roughly comparable in look (albeit probably a bit smaller), is £4.00 and being resin just needs painting, no assembly. Each to their own but unless the price difference was silly, I'd always choose resin.
PS. Back in 2023 I'd bought a Warbases 10mm Tudor Cavendish Cottage (here). The roof was missing and I never got round to Warbases for a replacement. Therefore, when I was working on the 15mm house I added a thatched roof to the 10mm one using the methods described above.
The 10mm one came with a separate grey board sheet, which gave all the wood panelling and makes it look so much better. I really don't know why they don't do the 15mm range the same way. I much prefer the 10mm building and I'm thinking that for larger battles with the buildings representing an area rather than a "true" scale skirmish size game, then the 10mm would work just fine.


An excellent bit of building Andy, looks a lot better with the beams.
ReplyDeleteThanks Ray, yeah it's worth the effort.
DeleteGiven how much work you did on this kit, I was thinking it may have been easier (and cheaper) to start with some foam core rather than buying a kit in the first place. either way - great job.
ReplyDeleteThanks and I agree. I'll just build my own or buy resin in future 😃
DeleteGreat job. Looks great
ReplyDeleteThat's a great finish.
ReplyDeleteThanks Richard, always appreciated.
DeleteWonderful up grade to that MDF building. I really like the texture you achieved on the walls.
ReplyDeleteYou spruced it up beautifully. The Hovels buildings have always been good looking and functional if also economical it's an obvious choice! (Aside from scratch-built, which is always my preferred).
ReplyDeleteBest wishes, James