The Great Tree Project, Phase One - Week One
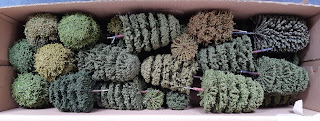
Years ago (so long ago that I can't recall which year) I picked up a great big box of trees at a very good price at a local wargames show.
All of them had thick wire trunks with some tape wrapped round, leaving varying millimetres of wire to stick in a base. They've served me well as they were simply stuck as needed in my terrain boards which are made of layers of polystyrene roof tiles. However, over the years the tiles have now begun to look combat weary. Additionally I've been working on making some flat terrain mats to lay on a table so there's no surface to stick the wire in. To keep up the good work of the last year in getting stuff done, I decided to finally sort this out and base all the trees. I wanted to do this with minimum of cost, but make some good looking terrain pieces that had some flexibility
Day One (23/05)
First step after rescuing the box from the loft was to check what I had. There's 19 large trees 14cm tall, 7 medium at 11cm tall and 4 small trees around 7 cm tall.
I then checked my box of bases. At Salute 2016 (the last one I managed to attend due to weekend rail disruption and pandemics) I got a few hundred varying size bases for a few quid, which included a number of large oval ones which I'd yet to find a use for. Playing about with these I found that I could fit three trees on which was perfect. I decided to use seven of these and then a mix of 32/50/60mm bases for single small/medium/large trees.
The final task for the day was to drill holes in each base for all the trees. Using my mini Archimedes drill for pilot holes and then my trusty pin vice to drill the correct size hole for the wire trunks this was duly accomplished.
 |
| Pinning in progress |
 |
| End of Day One |
Day Two (24/05)
Hobby time today was bevelling the edges of all the bases, taking these down from 2mm to 1mm. With a sharp X-Acto this didn't take too long but it was a messy job so I was pleased to get them all done.
Biscuits or bevelled bases?
End of Day Two.
Day Three (25/05)
Day Three was divided between two activities.
First I textured all the bases by adding a sand mix. Nothing new here just on a bigger scale. My usual sand mix pot wasn't big enough to fit the large oval bases in, so I got a takeaway container and filled it with a mix of sharp sand, gravel, small stones, some sawdust, some Javis urban scatter and whatever other textured scatter I had lying around. A good covering of PVA and a dip in the mix, shake off and on to the next.
The second task was to add a more tape to the wire trunks. I got a strong outdoor tape, cut it into strips and wrapped this very tightly round the wire leaving only a few millimetres of wire bare.
Day Four (26/05)
After leaving all the bases to harden over night, I gave them all a good brushing to get rid of any loose sand mix. I find it really annoying when you start painting and it all starts to come off! I'd decided to treat these more like miniatures bases than terrain pieces, so I went for my usual colour palette, but used cheap acrylic paints from the Works rather than miniatures paints. I duly mixed up a colour from burnt umber, black and a touch of yellow ochre to be close to Vallejo Model Colour Leather Brown which is my preferred earth basecoat. I wasn't too exact about this just going for a decent dark colour and good coverage.
 |
| Chocolate biscuit anyone? |
Day Five (27/05)
Another day with split tasks.
First I drybrushed all the bases with Vallejo Game Colour (VMC) Earth.
Secondly I started improving the tree trunks. I added a layer of Green Stuff onto the taped wire of the trunk to make a more irregular, realistic trunk shape and then with a sculpting tool roughened it up. I also added a lip at the base of the trunk to resemble the root plate. This took quite a bit of time.
I did another session later on, but used the rest of a packet of Milliput that I'd had since 2014. It went on OK but the Green Stuff was better. Using the Milliput I found I couldn't do the root plate so left these.
Day Six (28/05)
I had a few more tree trunks to do so reverted to using Green Stuff. I also added all the root plates to the Miliput covered trunks.
Day Seven (29/05)
Saturday, more time for hobbying today as no work.
Painting time. Having spent a lot of my time in woodland I can say that tree trunks are very seldom brown. Of course there is massive variation dependant on species, age, aspect etc but most mature tree trunks are more grey than brown. To try to capture this I mixed up some old Citadel Foundation Khemri Brown and the dregs of a P3 Bane Base pot which is a dark grey. This mix covered and sealed the trunks beautifully in one sludgey coat, giving a good base to work on.
While the trunks were drying I drybrushed the bases with VGC Khaki.
Once these were dry I added patches of flock to all the bases. That was the final job for week one. They're starting to come together now.


Comments
Post a Comment